Deploy a PHP application from git or SVN
Contents
Source control management tools such as git and Subversion are widely used by individual freelancers and collaborative distributed development teams alike.
We made it really easy for you to deploy straight from your code repository to your Enscale environment to give you the fastest and easiest deployment process.
Deployment steps
Log in to your Enscale dashboard
Ok, it’s obvious, but to get started you need to Log In to Enscale dashboard. We’re going to assume that you’ve already created a new Enscale PHP environment with your choice of Apache or NGINX web server. If you haven’t, just hit the New Environment button and do that now.
Now you just need to tell us where your repository lives. That can be absolutely anywhere you like on the Internet; Bitbucket, GitHub, Google Code, or even your own in-house system, as long as you’re using either git or SVN (need a different SCM? Let us know and maybe we can add support in future!).
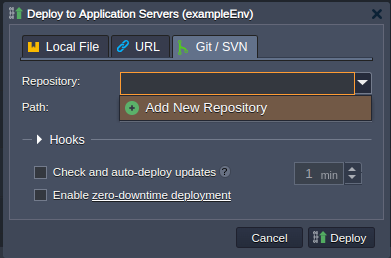
Expand your environment to view each of the individual servers (using the icon at the left-hand side of your environment’s name), and then select the deploy from Git/SVN button as shown below:

Select your project or add new project in the project field as below:

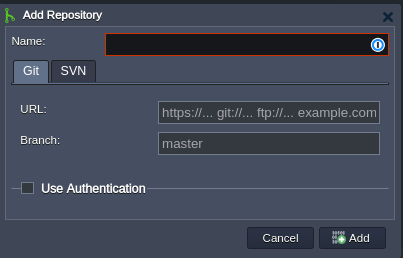
Git connection details:

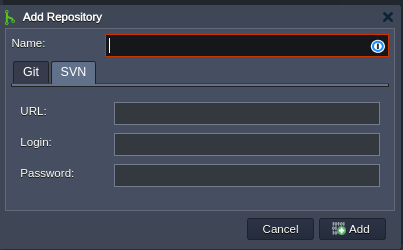
SVN connection details:
- URL: the path to your SVN repository (in SVN any branch or tag forms part of the URL)
- Login: repository username (leave blank if not required)
- Password: repository password (leave blank if not required)

In this example we’ll just use the WordPress public SVN repository, so no login details are needed; obviously if you’re using your own private repository you need to enter its corresponding login details.

If your repository runs on a non-standard port, just append the port number to the end of the URL like https://your-repo-path/tag/deploy:8080 (for port 8080).
Finally you need to specify the path that you want to deploy to. The default ROOT here means your code will be deployed to http://your-environment.j.layershift.co.uk/ . Alternatively if you wish to deploy to http://your-environment.j.layershift.co.uk/example/ just enter example as the environment deployment path.

When everything is perfect, click Deploy to complete the process, and watch Enscale do the work for you!

Once it finishes Updating the checkout is complete.
Checkout your updates
Over time of course you’ll make changes to your code and you’ll want to publish those changes. Easy on Enscale. Just hit the Update from SVN (or Update from git – depending on repository type) button:
